BAKING POWDER BISCUITS – YUM!!

This blog post was requested by my daughter in law after we had a “big breakfast” last weekend.  If we have time, we try to have bacon, eggs, and baking powder biscuits every so often to start off the weekend in a more relaxed way. 🙂

I’ve been making this recipe for years and years and it makes the most fluffy biscuits that just beg to be smothered in butter and jam, hot from the oven.  I just looked at the bottom of the original recipe and its from Canadian Living magazine circa 1991!  That is a lot of years haha! They were supposed to be Currant Scones but sans currants they are baking powder biscuits.

INGREDIENTS:

2 1/4 cups all purpose flour

2 Tblsp granulated sugar

2 1/2 tsp baking powder

1/2 tsp baking soda

1/2 tsp salt

1/2 cup currants or raisins or cranberries

1/2 cup of cold butter (I use margarine)

1 cup of buttermilk (I’ve tried milk with 1 tsp vinegar in a pinch, but buttermilk is better)

1 egg lightly beaten

DIRECTIONS:

In a large bowl, stir together flour, sugar, baking powder, baking soda and salt. Use a pastry blender to cut in butter until it resembles course crumbs.  If you want to add currants/raisins/dried cranberries add now.

Add buttermilk to well of dry ingredients and mix with a fork until it makes a soft, sticky dough.

Lightly flour your surface and press dough into a big ball and knead gently approximately 8 – 10 times. Don’t over work your dough or you’ll end up with hockey pucks 😦

Gently pat the dough into a circle approximately 3/4 inch thick.

IMG_4357

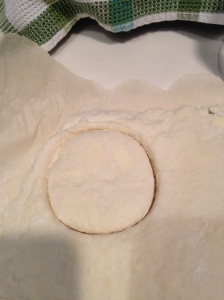
Using a floured cutter or a small round glass and cut out rounds.  Gather up the scraps and press together to make a couple of more of “cooks” biscuits (the less perfect ones)

Brush the tops with beaten egg.

IMG_4358

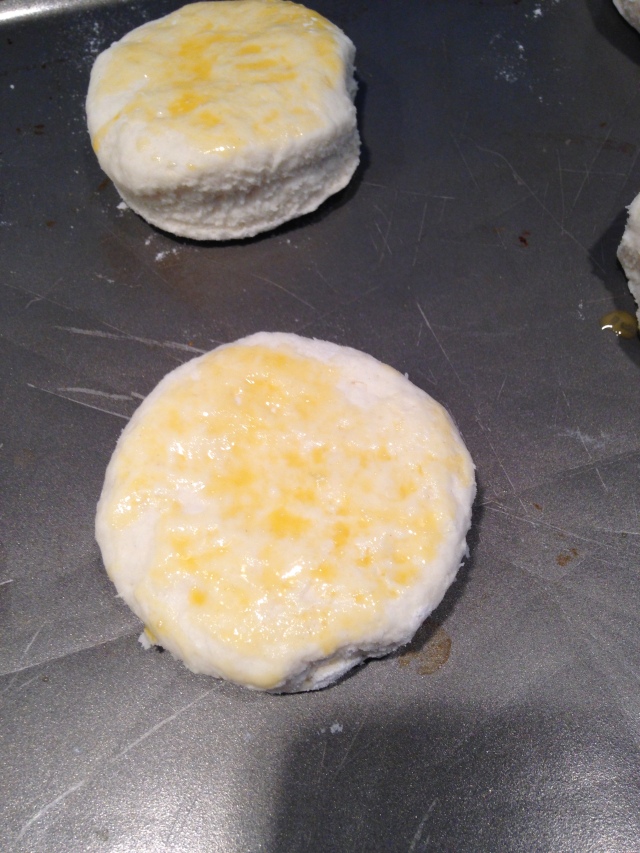
Bake in the oven 425 F degrees  for 12 – 15 min until golden brown.  They should puff up and you should be able to see all the layers. Cool on a rack if they last that long!!

Cheers to you enjoying a relaxing weekend breakfast 🙂

LIVE LIFE FULLY ❤


BLUEBERRY LEMON CAKE

I've made this cake quite a few times and it becomes a favourite of everyone who tries it.  I mean what's not to like, blueberries and lemon, yum!

It's an easy, no fail recipe and makes a great cake for a backyard barbeque.  I used frozen blueberries as I didn't happen to have fresh ones on hand today, but both work well.

INGREDIENTS

2 cups all purpose flour

1 Tblsp of Baking powder

1/2 tsp salt

1/4 tsp freshly grated nutmeg

3/4 cup butter

1 cup granulated sugar

4 eggs

1/2 cup milk

2 tsp grated lemon rind

1 tsp vanilla

2 cups fresh (or frozen) blueberries

GLAZE:

1/2 cup granulated sugar

2 Tblsp fresh squeezed lemon juice

DIRECTIONS:

Stir together flour, baking powder, salt and nutmeg. Set aside.

Beat butter, add sugar and beat until fluffy.

Add eggs one at a time, beating in between.

Add dry ingredients to wet ingredients alternating with milk.  Stir in lemon rind, vanilla and blueberries.

Pour into a greased 9 x 13 inch pan.

Put in 350 F oven for 40 min.

Spread glaze over warm cake.

Serve warm or room temperature. Either way its delish!!  Give it a try and I guarantee it will become a favourite 🙂

As a side note…This could also be made using gluten free flour that is one to one ratio. It turns out well as well.

LIVE LIFE FULLY ❤


IN A “JAM”

We’ve had such nice weather lately that when I was out in the valley this week, I decided to stop at the local berry farm and pick up some berries.  I opted to not “U-pick” as I was wearing white pants that day. 🙂   I headed into the market and found the berry counter.  After looking at the “flats” I purchased a 15 lb flat of strawberries and 10 lb flat of raspberries.  It wasn’t until I got home that I realized how many berries I actually had gotten!  I think I was mesmerized by all the good looking red berries haha

Once home I had to decide what to do with 25 lbs of berries!  After all you can only drink so many smoothies and eat so much yogourt with berries sprinkled on top.  Off to the market to pick up more mason jars, sugar, lemons, and pectin (liquid).

These recipes make one batch.  I made strawberry and raspberry jam and the recipes are slightly different but the general idea is the same.

I took the lids off the jars and washed them all in hot soapy water, rinsed well and placed on a deep cookie sheet with 1/2 inch of water in a 300 F degree oven to sterilize them.  I leave them in until just before I have to fill them.

IMG_4201

Take the lids and place them in a sauce pan with water and bring to a simmer. (Screw caps don’t have to be hot and sterilized.

RASPBERRY JAM

4 cups prepared raspberries (pick out leaves, stems and rinse quickly)

6 1/2 cups granulated sugar

1/2 tsp of butter

1 pouch of liquid pectin

Use a deep stainless steel pot as jam will boil up quickly.

Add the raspberries and the sugar and use a potato masher to crush.  I keep crushing and stirring until the sugar is all incorporated.  Add in the butter as it keeps the foaming to a minimum.


Boil over high heat stirring constantly until it comes to a full rolling boil that can’t be stirred down.  Add one pouch of pectin and stir in. Boil x 1 min and then remove from heat and skim off any foam.

IMG_4229

Place the hot jars on a clean tea towel and using a wide mouth funnel fill the jars up to 1/4″ from the top.  Wipe the mouths of the jars so that no stickiness remains and top with heated lids and apply the screw cap and screw finger tight.


Place jars in a hot water bath using a canner, with 1″ above all the jars.  Cover the canner with the lid and bring water to a full rolling boil. I boiled them for 10 minutes.  Turn off the heat at 10 min and remove the lid and let sit for 5 min.  Then using a jar lifter I removed the jars from the water and placed them on another dry tea towel.  Within a few minutes you will start to hear the lids popping (they become concave).  Do not move for 24 hours.

Then label and put away to enjoy!

I used 500ml (1 pint)  canning jars and each “batch” made 3 – 4 jars

STRAWBERRY JAM

3 3/4 cups of crushed strawberries (hull, wash, slice and crush)

4 Tblsp lemon juice

7 cups of granulated sugar

1 pouch liquid pectin

1/2 tsp of butter

Add the sugar, and strawberries and lemon juice and crush until there is no dry sugar visible.

Bring to a full rolling boil and then add the pectin and boil for 1 minute.  Follow the remaining directions for filling jars and water bathing as above.

I ended up with 12 pints of strawberries and 10 pints of strawberries, plus I froze a  ton of berries as I was getting tired from standing and stirring.  Plenty of other recipes to come in future blogs.

Stay tuned!!

LIVE LIFE FULLY ❤


SPRING MEANS RHUBARB!!

IMG_4092

When I was little, my fondest memories were going into the garden and cutting a stalk of rhubarb and then sitting with a glass with sugar and dipping and eating it.  I’m sure we all ended up with a stomach ache but I don’t have those memories haha.

I’ve tried to grow it, but have been unsuccessful so far.  I will try again this year, but in the mean time, it’s off to the market I go.

This recipe is similar to my Apple Crisp.  I have changed it a bit to give it a more fresh, spring like flavour though.

Ingredients:

Rhubarb (I prefer the red coloured ones) Amount depends on how big your casserole is. I usually take about 8-10 large stalks.

1/3 – 1/2 cup of white sugar depending on tartness of rhubarb.

grated rind of one large orange

Crisp:

3/4 cup Gluten Free Oats

3/4 cup All purpose flour or Gluten Free all purpose flour (I use Bob’s Red Mill  1:1)

3/4 cup golden brown sugar (packed)

1/2 cup of cold margarine/butter

Wash and chop rhubarb into 1/2″ pieces. Place in a deep dish casserole dish. Once all the rhubarb is cut, add the white sugar and orange rind and mix thoroughly.  Always cut enough fruit to come within a 1/2″ of the top of the casserole as it will shrink with cooking.

Add the “crisp” ingredients and cut in the cold butter with 2 knives or a pastry blender, until the butter /margarine is the size of peas.

Pack on top of the rhubarb and put right to the edge. I tend to pack fairly tightly as it keeps the juices in and gets a nice crisp texture. (always the best part 🙂 )

Cook in a 350 degree oven until the edges show bubbling juices and the top is golden brown.

Serve warm with a scoop of vanilla ice cream or eat it cold.  Either way its a delicious taste of spring and I for one, look forward to each spring!

Enjoy!!

LIVE LIFE FULLY ❤

BANANA PECAN MUFFINS

If you are looking for a tasty, high fibre muffin, this is it!  It’s from Canadian Living Magazine, I believe, in the 80’s.   So moist and flavourful and they freeze well.  The orange zest gives the muffins a bright fresh taste.

Ingredients:

3 large ripe bananas, mashed

1/3 cup of melted butter ( I used margarine)

1 egg

1 tsp vanilla

grated rind of 1 whole orange

1 1/2 cups all purpose flour (I used Bob’s Red Mill, 1 to 1)

1/2 cups granulated sugar

1 tsp baking powder

1 tsp baking soda

1/2 tsp salt ( I use less in all my recipes)

1/2 cup chopped medjool dates (remove pits)

1/2 cup chopped pecans

In one bowl, mix bananas, butter, egg, vanilla and orange rind together. (the bananas had been frozen and they started to congeal the melted butter, but it still worked out fine)

IMG_3956

Sift together flour, sugar, baking powder, baking soda, and salt. Add dates and pecans and toss together lightly.

Pour dry ingredients into wet mixture and stir until just combined. Spoon into 12 large muffin cups.

Bake at 350 degrees  for 20 minutes.  Check with a skewer to see if it comes out clean. If not, put in for another 5 minutes and check again.  (the original recipe says 15 – 20 minutes)  I’m not sure if its my oven but mine is convection and I find it takes at least 25 minutes.

Let cool and then enjoy (If you can wait that long 🙂 )   Great with a cup of tea or a dish of yogourt for breakfast!

LIVE LIFE FULLY ❤


Chocolate Chip Cookie Pie!

IMG_3887

I recently saw this recipe done up and it was so quick and easy that I had to give it a try.  I was visiting my mom and I thought it would be something she could whip up when she has her ladies group over and doesn’t want to make something too involved.  I also am looking forward to give it a try when the family comes over next time. 🙂

Ingredients:

1 large package of chocolate chip cookies ( I used Chips Ahoy)

1 glass of milk

1 large tub of Cool Whip

8 x 8 pie plate or cake pan

Dip cookies one at a time into glass of milk and then shake off. Layer in bottom of pan.

Cover with layer of Cool Whip, then dip cookies and layer on top of Cool Whip.  Continue until you have used up all the cookies except for 2 or 3.

End up with a layer of Cool Whip. Crumble the remaining few cookies over the top or you could use a several miniature chocolate chip cookies as the top layer.

Cover with Saran wrap and leave in the fridge for 2 – 3 hours.

Serve and enjoy!


SLOW COOKER BEEF SHORT RIBS


IMG_2823

It’s cold and rainy outside. The perfect day for comfort food. I’ve been meaning to make this dish the last couple of days but left it too long and it wouldn’t have long enough in the slow cooker so today was the day!!


This post is part of the monthly link up party Our Growing Edge. This event aims to connect food bloggers and inspire us to try new things. This month is hosted by Jess at Little Girl Story.

growing edge


I don’t have an exact recipe as it just depends on what I have in the pantry/fridge, but the basics are there.

The beef ribs I get are thin sliced and there are 4 – 5 slices in a package. Today I used 3 packages so approximately 15 beef slices.


1 Tblsp extra virgin olive oil

Salt/pepper

1 quart of canned tomatoes (still using my own canned tomatoes)

1 cup ketchup

1/2 cup of gluten free barbeque sauce

1/2 cup of celery ribs/leaves, chopped

1/2 cup of sweet white onion, chopped

1 Tblsp of Worcestershire sauce

1 Tblsp of dry mustard

2 Tblsp of brown sugar

1 Tblsp of white vinegar

1 cup of beef stock

1 Tblsp of cornstarch or potato starch

So I start by sprinkling the meat with salt and pepper and brown both sides in a hot frying pan or deep pot with the olive oil. Don’t over crowd meat or it just steams and doesn’t brown.

Once the meat is all browned (it takes several batches to get it all done), I add in the onions and celery and cook until wilted and slightly carmelizing.

IMG_0061


Add all the other ingredients, except the cornstarch, into the slow cooker. Break up the tomatoes and stir all together. Add in celery and onions and then layer meat in until all the meat is covered by the sauce.


Turn the slow cooker to high until it starts bubbling and then down to low to let it simmer for 4 – 5 hours.

IMG_0062

Twenty minutes prior to serving make a slurry with cornstarch using either water or beef stock and add to pot. Cover up with lid and let thicken.


Serve with mashed potatoes or rice and vegetables.

I can smell this cooking as I sit here and can hardly wait for supper.  Yum!

I hope you give this a try! You won’t be disappointed.

LIVE LIFE FULLY ❤


Bunny Eats Design Our Growing Edge

Reflections of 2015!

Well yet another year is coming to a close! I’ve made a short list of some of the things I’m grateful for that happened this year. 

Firstly, I was able to spend a lot of time with my dad and mom before my dad passed away in April.  I went back to MB every month/6 weeks for the last year of my dads life. They had 65.9 married years together and for that I’m grateful. I’m also happy that I was able to guide them both through a difficult process with a minimum of trauma. 

  
I’ve been able to watch my little grandson at least once a week and sometimes more. I love being a part of his life and giving out lots of grandma cuddles. This is my most favourite title – grandma ❤️❤️❤️. I look forward to many more days spent with my wee man. 

  
Watching my middle son get married to a wonderful girl, who I’m proud to call daughter.  I gave a speech at the wedding. One of the things that is hard to fathom is seeing them getting married and having children of their own.  When you are raising your children, at least I never did, looked that far ahead.  I’m grateful that they are a happy, healthy little family.  I hope they have many many many more years together 👪

  Celebrating 31 years of marriage and of being together for 35 years with a wonderful man who treats me with love and kindness every day. He is my best friend and we love each other so much! 👫. I look forward to many many more years with him. 

  
Happy that all my kids are learning and growing and turning into adults that we are very proud of!! ❤️

Went to Las Vegas with dear friends to celebrate my birthday! Made a big milestone more palatable haha. 

Got asked to come back to a position I left 7 years ago. Working two jobs but enjoying my career and not ready to retire just yet…

Having my mom out for Christmas is a real treat. I didn’t want her spending Christmas in wintery MB all alone. She is just asking for sun 😐. Sorry we live in “Raincouver.”

  
Going forward to 2016 I am hoping to start spending more time looking after myself so that I can continue looking after every one else, because that’s what I do! 

I wish all of you a happy, healthy and prosperous New Year.  Be kind to yourself and to one another as you never know what someone is going through.  Everyone deserves a smile or hug or a random act of kindness. That small gesture could possibly turn around someone’s day for the better. 

LIVE LIFE FULLY ❤️

BABY BANDANAS

I’ve made quite a few of these easy to whip up baby bandanas.  I’m one of those people who won’t spend money on a pattern unless absolutely necessary 🙂  When my grandson was born my daughter in law had purchased a couple and then asked me to make some. My technique improved as I went along.

Just lately my daughter in law’s girlfriend asked me to make some for her little fellow, and so I did.  I tend to have more little boy fabrics lately, go figure haha.

IMG_3163IMG_3165

The first 3 are a little brighter and the second 3 are a little more retro looking.

I cut out a triangle in fabric and one in minky fabric (or you could use flannel), put them right sides together and sew around the edges leaving a 1 1/2″ gap to turn right side out. Trim the edges so that you don’t have bulky corners.  Then I iron them and sew a border tucking the opened edge in and catch it with the border stitch.

They are all backed with minky fabric. Soft and cuddly for little necks. I also used the little plastic snaps which are so handy 🙂 I added 2 so that she could adjust as her little one grows.

IMG_3169

IMG_3161

IMG_3159

So fun and so quick!

IMG_2836

Here is a little throwback to when I made a Halloween bib and little “boo” bag for all of little man’s treats 🙂

Little bags are another quick gift I make and have been making for years. Put a couple of books in and you have a quick and well loved gift!

Enjoy!

Remember to LIVE LIFE FULLY ❤


BEST BRUSSEL SPROUTS…EVER!

My husband has always loved Brussel sprouts, but me…well not so much.  I have always tried to get the kids to eat or taste everything I cooked including the dreaded “alien heads”.  Yes, that is what they ended up being called.

One year I found a similar recipe and adapted it and voila!!  We now have a family favourite.  I swear if I only made these and the stuffing (see previous post), no one would complain.

Quick and simple.

I pick out maybe a pound of small to medium Brussel sprouts, peel off the outer leaves and cut them in half.  If larger cut in quarters.

IMG_2907

2 Gala apples, chopped (you can leave the peel on)

IMG_2905

6 – 8 slices of bacon chopped.

In a large sided cookie sheet I brown the bacon to soft stage (slightly cooked, starting to brown)

IMG_2931

Then I add in the apples and the cut up Brussel sprouts and stir to get the bacon fat all over.

IMG_2932

Cover with aluminum foil and put in a 350 F oven for 20 – 25 minutes until the Brussel sprouts are softened.  Then take the foil off and cook until starting to crisp around the edges.

IMG_2935

This is by far the best way to do Brussel sprouts and you’ll having your harshest Brussel sprout critics asking for a second helping.

Enjoy!!

LIVE LIFE FULLY ❤